How to install WP Spell Check Pro

How to install WP Spell Check Pro


1. Login to your account at www.wpspellcheck.com/account

2. Download the ‘wp-spell-check-pro.zip’ file from the Download page

WP Spell Check Pro


3. Click on ‘add new’ under the plugins section of the WordPress administration panel

 
Step-3


4. Click on ‘upload plugin’ and select the ‘wp-spell-check-pro.zip’ file.

WP Spell Check Pro


5. Through the ‘Plugins’ menu on your WordPress Website’s back-end, install & Activate the Pro plugin

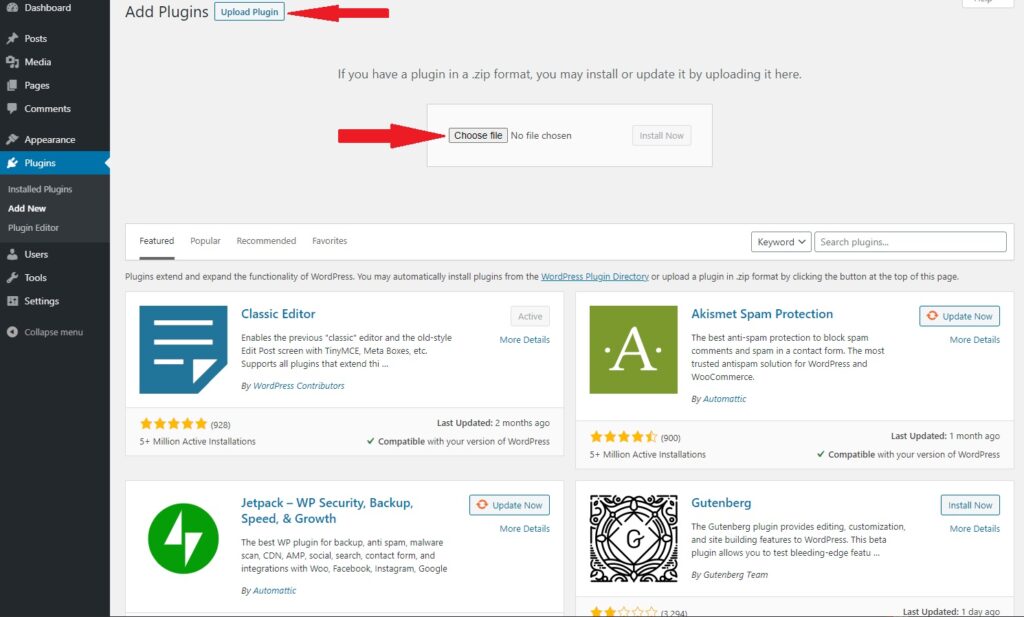
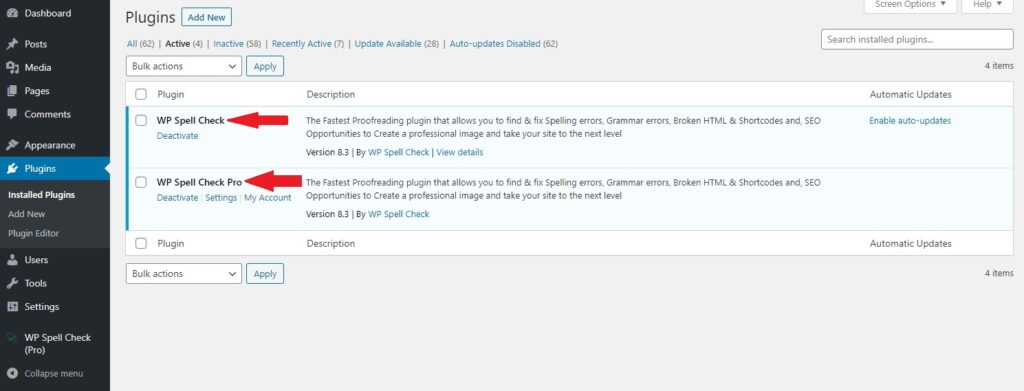
Note: You must have both the Base version and Pro version installed and activated


6. Go to www.wpspellcheck.com/download-pro/,  and copy your API Key into 

WP Spell Check Pro


8. Go back to Your website to WP Spell Check’s General Options page, PASTE your API Key, and click save.

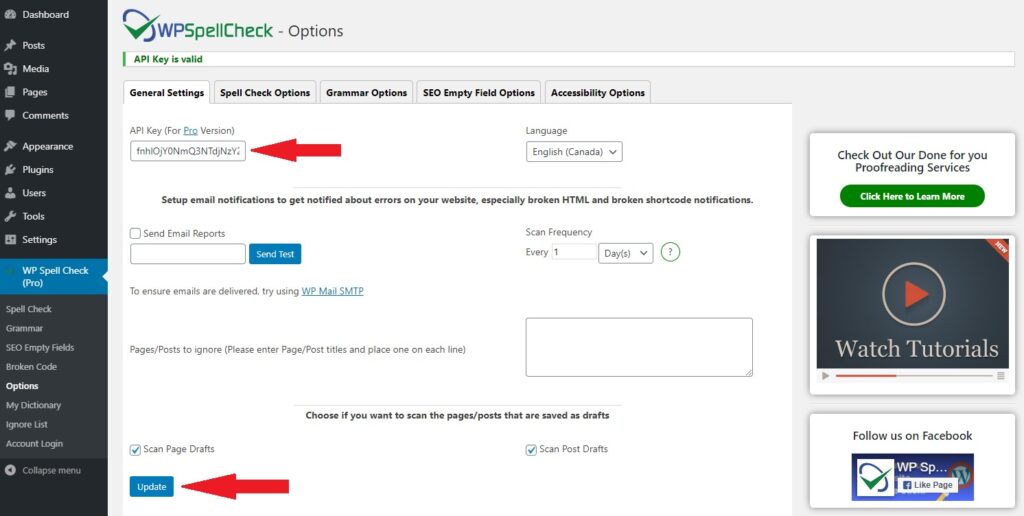
If the API key is valid, you will get a confirmation message on the Options page upon saving


9- Click on Spell Check on the left sidebar and spell check entire WordPress site with one click! 
 
Remember: the Base version and Pro version must be BOTH installed and activated